


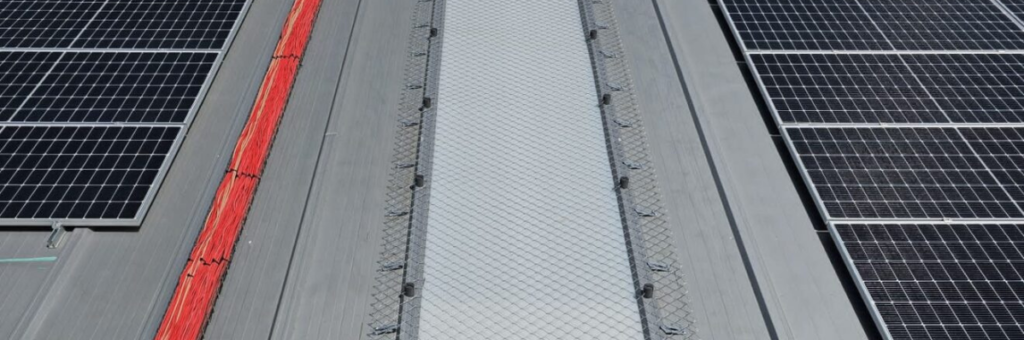
We have previously talked about our Pignus safety nets. Today we will focus on the importance of following the manufacturer’s recommendations on how to install them, to ensure the safety of these systems and of the roofs.
Types of Nets
There are different systems for protecting translucent panels and skylights. Specifically, at Ypsos we have the following systems:
- Pignus Plate – For single sheet metal roofs.
- Pignus Panel – For sandwich panel roofs.
- Pignus Skylight Fix – For skylights (interior installation).
- Pignus Skylight Flex – For skylights (exterior installation).
Installing PIGNUS Safety Net
The first step for a correct installation is to select the appropriate systems according to the type of roof we have. Once that is settled, we will explain how we would install the most common systems, Pignus Plate and Pignus Panel.
These systems are used to protect flat translucent panels. They are identical in their component elements, but differ in the installation steps depending on the model selected.
How Do I Install the Safety Net?
Remove Obstacles

In both cases, the first thing we must do is to remove from the translucent panels and their surroundings any elements that could hinder or interfere with the installation. Once that is done, we will proceed with the installation.
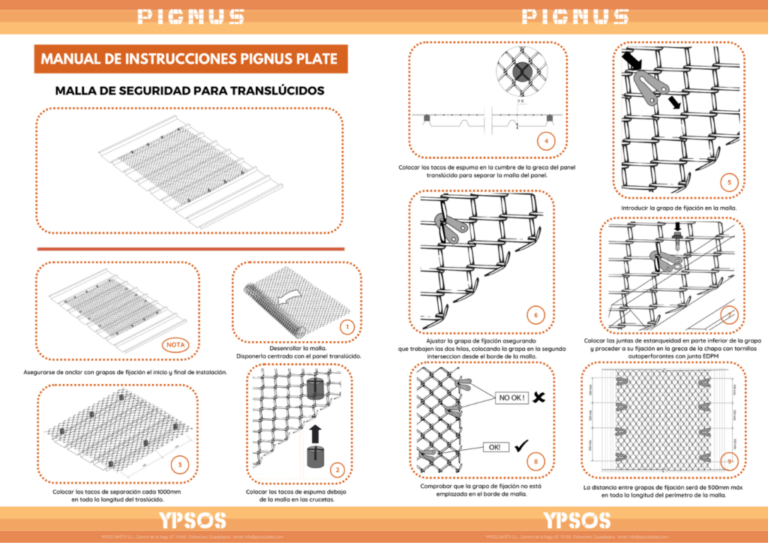
Unroll the Net
Pignus safety nets come in 25 m rolls, in different widths to cover the various skylight sizes we may encounter. To do this, we will unroll the selected net over the translucent panel. If the skylights are very long, it is not necessary to unroll the entire net; we can carry out the installation in several sections.
Placing the Spacer Blocks
Once this step is done, we will place the spacer blocks (foam blocks), which prevent the net from rubbing directly against the translucent panels to avoid damaging them, while also absorbing the vibrations they produce.
They are placed lengthwise along the entire translucent panel, on the rib closest to the edge of the net, at a distance of 1000 mm from each other.
Fastening the Net to the Roof
With these steps completed, we move on to one of the most important aspects, and the one that requires the most attention: fastening the system to the roof.
With our fastening clips, hardware (specified in the manuals), and sealing gasket, we will fasten our systems to the roof. They must be placed along the translucent panel, at a distance of 500 mm from each other, and several factors deserve emphasis in this respect.
- Depending on the roof, the fastening clip is positioned at one wire intersection or another, as specified in our manuals. This ensures that with Pignus Plate the fastening is made on the rib and, conversely, with Pignus Panel, on the valley. This ensures sufficient strength of these systems so that, if activated by an accidental fall, the system is able to arrest the user. As we can see, the anchors perform a very important function in these cases, so we must pay special attention when making the fastenings.
- The sealing gaskets are placed underneath the fastening clips. This is another very important aspect, as we must eliminate the possibility of leaks in the roof caused by fastening these systems; with the gaskets, we ensure the roof remains waterproof.
- Another very important point when fastening is not to exceed the tightening torque of the hardware, since we could strip the threads, causing the hardware to lose its function.
Once these steps are completed, our system will be installed.
Recommendations for Installing the Safety Net
It is very important to follow the steps indicated by the manufacturer in full and not to alter any element or its purpose, since otherwise the effectiveness of the system would be compromised, the warranty would be lost, and the system’s certification would be void, with the personal and legal consequences that may result from the noncompliance.
It should be remembered that, although there is no current regulation applicable to these systems, an annual inspection of the system must be carried out, or sooner if any anomalies are observed. This is for both user safety and preservation of the warranty.